First steps to new project


Every time I start new project I begin with small bits and pieces to ude into it, than make main structure and having dimensions and general idea, I can make more pieces.
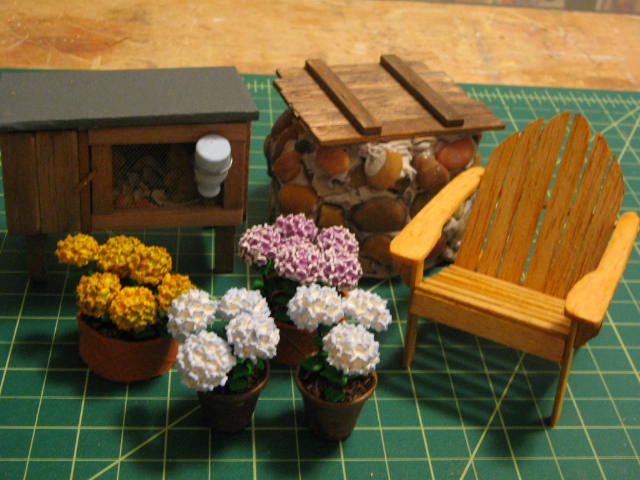
So, this time, along with making small pieces from printies like books, packs of soil and etc (yeah! it will be a garden with trailer adapted to gardening shed), I made already three bigger things.
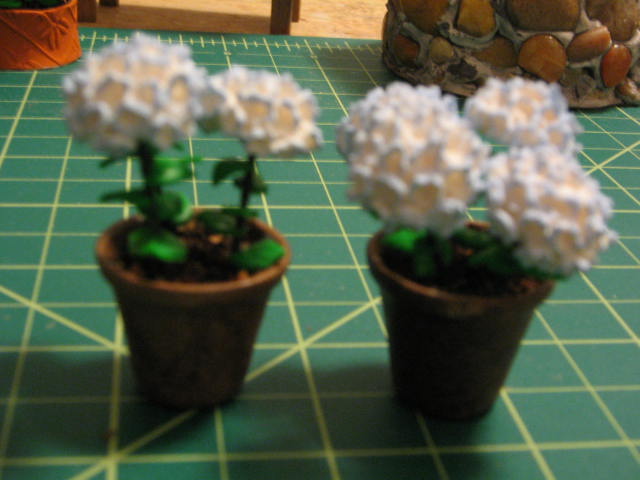
First, I made hydragenas from Polymer Clay and it was really chalenging. That was my first attempt to make so complicated plant from clay. I adapted project from booklet which was intended for bread dough but I feel more comfortable working with Polymer Clay. And it worked really nice.
I made half balls as bases for flowers, push into it green cloth covered wire (first a blob of liquid clay, in this case TLS). Also covered rounded side of base with TLS, cut small flowers from very thinn rolled clay with cutter, shape them a little to make them look more 3D by pushing the middle with ball tool and put them onto base, close one to the other as much as possible. Bake. From green clap, rolled thinn cut small leaves, make some veines with knife and bake. In order to glue leaves onto stems (that cloth covered wire attached to flowers), I cut in each leaf small traingle at the base, put some glue and puch wire into this whole, keep it a moment. By the way, it's best to have a piece of styrofoam or something similar, handy so You can put each flower into it for stability when gluing flowers and than leaves.
By the way, I learned one thing and hard way. In some projects You can read that it's good to put Your clay pieces on crumpled foil to avoid shiny sides from sticking to tile. Yep, but don't do it when using toaster oven. My yellow flowers got burned after just 4 minutes at 275F when normally it needs about 20 minutes to bake. Foil makes it bake so quickly! It's difficult to decide how long as it can burn in seconds. Luckily they were also baked already and I catch it up before they got burned completely so they just have some parts brownish. I solved it by painting whole flowers with another shade of yellow and than brushing it with a little of orange and final effect is quite nice. I used dry brushing also to add shades for another flowers.
I made two planters from terracotta colored clay by rolling it thinn (using pasta machine), cutting two circkles with round cutter, then long strips which I embossed with special embossing pin, than glued it around circkles using TLS and baked. I filled those planters as well as two ceramic ones painted with two shades of brown and crackling medium, with air drying clay (first put into them some glue to ensure the clay will not get loose after drying. On top I painted generous layer of glue mixed with brown paint, I sprinkled it with dried tea leaves. Than I pushed flowers into it before drying.
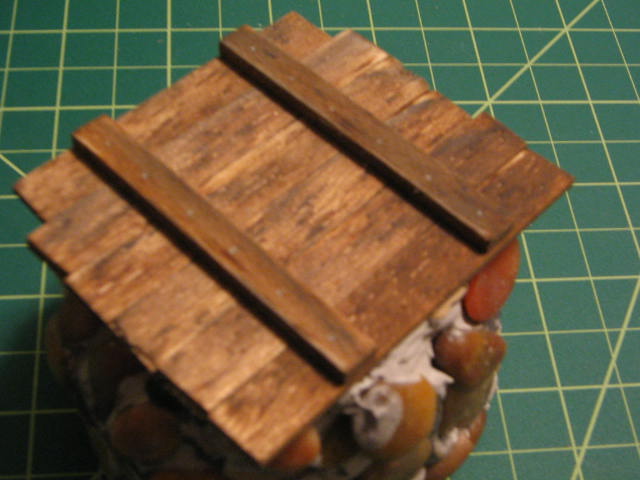
Than I made wishing well. It is supposed to be non-working anymore well so it's covered. But it will add a lot of interest to the garden. I cut cirkle from cardstock and glue on top of it piece of roll from inside of paper towells. When it dried, I build around it with Plaster of paris and as much stones as I could put there. When it dried I painted it with wash of gray paint, trying to avoid stones but some touched up to look like old. I made cover from scraps of balsawood, cut not perfectly even and stained them with Early American (it gives the wood very suitable color of old wood) and touched them with a little of gray wash (not too much, the best is to dry it with clothe after a moment so they don't turn gray, just a hint of dirt and weathering), sanded in places to make it looked aged. I glued together few planks, than glued on top two narrower strips, I painted with silver pen small nails. Glued the cover to the well.
The last of those projects and the most succesful in my eye, it's rabbit hutch. I made it using project from Dolls House and Miniature Scene, I had few problems with gluing it together as instructions weren't perfect but I managed it by trial and error method. All pieces were first cut and weathered the same method as cover for the well, than glued parts and fitted them together. I used piece of fabric canvas for mesh in the door. I made bed from short cut pieces of raffia. Added some slices of carrot (I had them at hand as I was making a lt of dishes with carrots lately) and of course rabbits. Water bottle is made from wooden milk bottle painted blue, adde wire loop, drinking stra from piece of cloth covered wire and glued into frame of door with straw pushed into canvas. Honestly it came out so cute I was suprised I made it myself! It took about 4,5 hours.
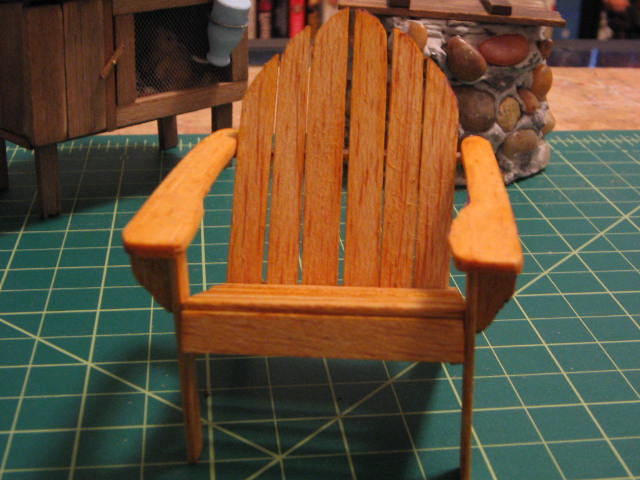
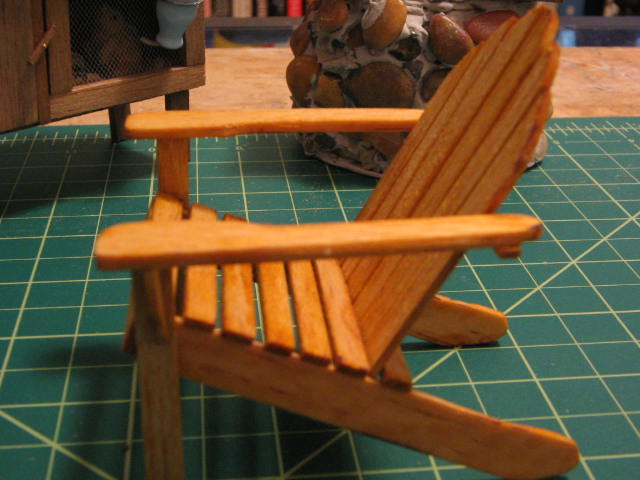
Added later: This afternoon I made adirondak chair for my gardener. I made it with a project from magazine and it came amazingly nice as I'm not great with wood. It took me about 3 hours to make it starting with cutting all the pieces, sanding and staining them (with Schellac, what a wonderful color it gives!) and assembling.
posted by Sylwia at
9:15 AM
![]()

0 Comments:
Post a Comment
<< Home